Provision Terraform
Torque Control Plane offers centralized orchestration and management for Terraform and other IaC tools. In this guide, we will go over some of Torque basic features allowing quick onboarding of Terraform modules into the platform, standardization of Terraform automation using blueprints and securing deployment process using tagging, policies and RBAC.
In this quick-start guide, we will cover the following topics:
- Create a new Torque Space
- Onboard a GitHub repository and discover the automation assets in it
- Generate your first blueprint and modify it to include deployment credentials
- Launch a blueprint and get access to the deployed resource in the newly created environment
NOTE: This guide will focus on AWS and Azure Terraform workloads, click here for more information about Torque supported platform.
Step #1: Create a space
Spaces are logically separate area that contains an association to one or more agents, asset and blueprint repositories and set of permitted users. Spaces can be used to logically separate between teams, projects, or even development lifecycle stages and allow the relevant end-users, administrators and blueprint designers to access only the relevant blueprints and environments.
-
To create a new space, use one of the following methods:
- Navigate to the "Administration" section and open the "Spaces" tab. This is the account space management section where you will be able to create, edit and delete spaces.
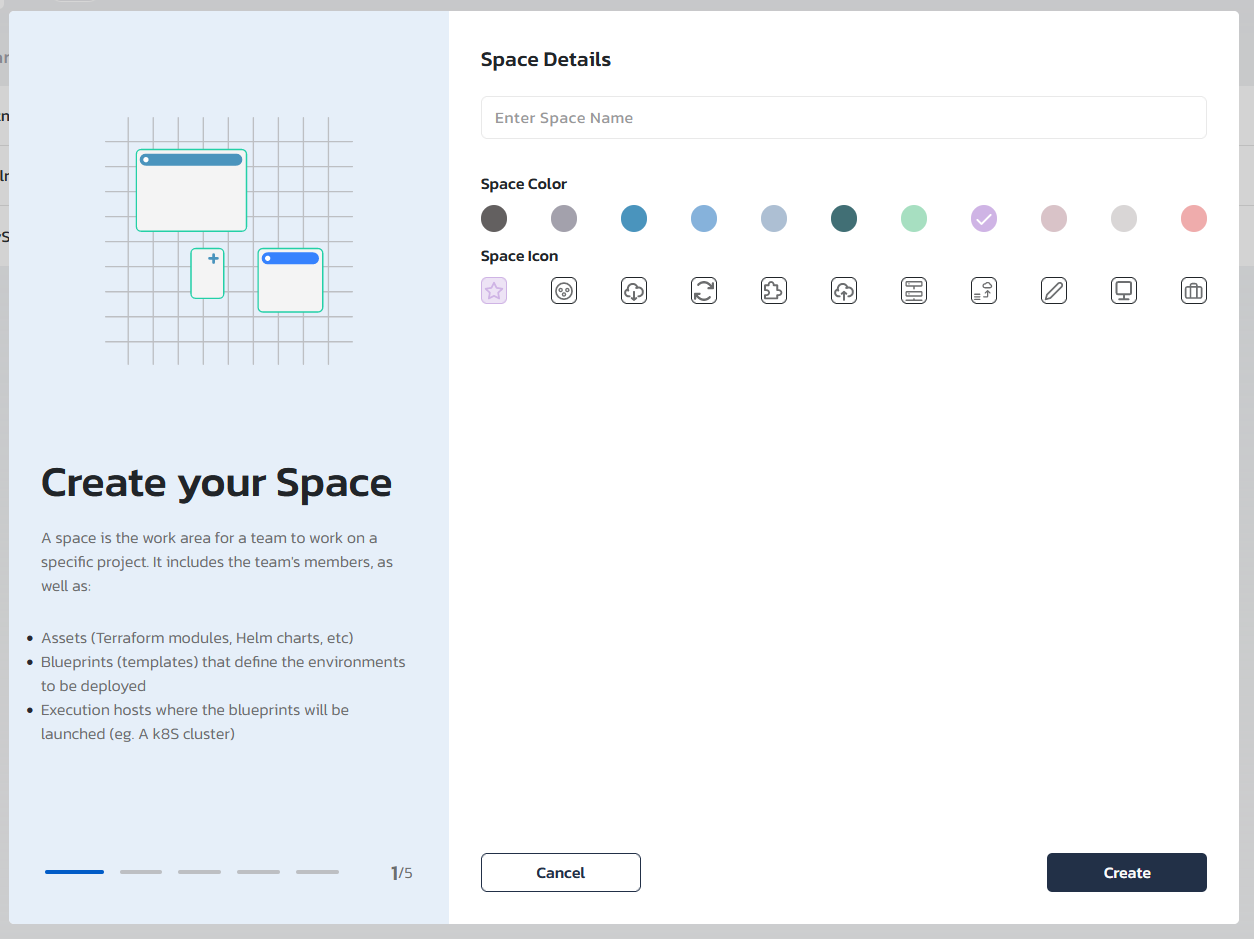
- In the spaces dropdown, located in the left side-menu, click on "Create new space"
-
Set the space name, image and color. Space name, image and color can always be changes in the "Administration" are under the "Spaces" tab
Step #2: Connect a repository
Now, that you have a new space configured, we will associate a repository to the space and generate blueprints using the automation-assets that will be discovered by Torque in that repository. We recommend using your-own repository hosted in one of the supported Git Providers. For using on-prem/hosted versions of one of the supported (Version Control System)) providers, see Repository Setup.
- In the repository onboarding wizard, choose your VCS provider, provide the repository URL and click "Connect". Torque will open a new windows where you will be requested to authenticate to the VSC provider. VCS providers work differently, but usually, a token will be generated for your user and Torque will use that for any communication with that VCS.
Note: you can always use this example repository with some pre-existing automation assets.
- Click "Discover Assets" to initiate the Torque asset discovery process that will go over the repository and highlight the automation assets Torque discovered.
- To generate a blueprint from one of the discovered assets, check the blueprint in the list and click on "Generate Blueprints"
- Click on "Connect an Agent"
Step #3: Set Quali Agent
In this step, we will configure our newly created blueprint (Created in step #2) to use "Quali Hosted Agent"
Quali Hosted Agent is a free pre-configured agent hosted by Quali allowing you to execute automation without the need to install, configure and maintain a "self hosted agent". In case you wish to use your own agent, follow the steps in this article and continue to step #4 in this article once you fully configured your agent.
- In the "Connect an agent" dialog, select the "Quali Hosted Agent". This will associate the "Quali Hosted Agent" with the newly created space allowing automation in the space to be execute on it.
- Open one of the generated blueprints generated in the previous steps by clicking on it's name in the "blueprints name". You will see the blueprint YAML generated for the automation asset. The YAML contains all the inputs and outputs of the Terraform module alongside some additional information about the location of the automation asset in the VCS repository.
- In the following step, we will modify the blueprint using the YAML editor adding authentication information for AWS or Azure so our Terraform module will be executed on them. This section is AWS or Azure specific, so make sure to follow the section matching your cloud provider.
AWS authentication
The Quali-hosted agent needs your AWS credentials to provision the environment on your AWS account. We will edit the blueprint to add the AWS credentials as environment variables, and expose them as inputs so it will be easier to provide them upon launch of a new environment. Editing the blueprint in the blueprint editor provides syntax highlighting, auto-correcting and live validation of the YAML and data provided. Make sure to click on "Save Changes" when updating the YAML to make sure the blueprint is saved in Torque.
-
Add the following inputs under the input section of the blueprint:
inputs:
  AWS_ACCESS_KEY:
    type: string
  AWS_SECRET_KEY:
type: string -
Add the following environment variables under the env-var section of the blueprint. For more information about generating AWS credentials, see the AWS documentation
env-vars:
  - AWS_ACCESS_KEY: '{{ .inputs.AWS_ACCESS_KEY }}'
  - AWS_SECRET_KEY: '{{ .inputs.AWS_SECRET_KEY }}'
Azure authentication
The Quali-hosted agent needs your Azure credentials to provision the environment on your Azure account. We will edit the blueprint to add the Azure credentials as environment variables, and expose them as inputs so it will be easier to provide them upon launch of a new environment. Editing the blueprint in the blueprint editor provides syntax highlighting, auto-correcting and live validation of the YAML and data provided. Make sure to click on "Save Changes" when updating the YAML to make sure the blueprint is saved in Torque.
- Add the following inputs under the input section of the blueprint:
inputs:
  ARM_CLIENT_ID:
    type: string
  ARM_CLIENT_SECRET:
    type: string
  ARM_SUBSCRIPTION_ID:
    type: string
  ARM_TENANT_ID:
type: string - Add the following environment variables under the env-var section of the blueprint. For more information about generating Azure credentials, see the Azure documentation
env-vars:
  - ARM_CLIENT_ID: '{{ .inputs.ARM_CLIENT_ID }}'
  - ARM_CLIENT_SECRET: '{{ .inputs.ARM_CLIENT_SECRET }}'
  - ARM_SUBSCRIPTION_ID: '{{ .inputs.ARM_SUBSCRIPTION_ID }}'
  - ARM_TENANT_ID: '{{ .inputs.ARM_TENANT_ID }}'
Step #4: Launch an Environment
At this point, you have done the following:
- Created a new space
- Connected an asset repository and auto-generated blueprints out of some assets
- Associated an agent that will handle the deployment and teardown of the environments
🚀🚀 You are finally now ready to launch your first environment! 🚀🚀
- To expose the new blueprint into the Space catalog, navigate into the Blueprints page and toggle the Publish option.
- Navigate to the Catalog and click the Launch button on the blueprint card.
- Specify the environment's name, duration, tags and inputs - note that some of the inputs may be the authentication information required for AWS or Azure as describes in step #3.
- Optionally assign collaborators to the environment. While everyone in the space has "read" permission to its environments, only the environment's owner and collaborators can perform actions that change the environment: extend end the environment, reconcile or update resource changes, etc. When launching the environment, the new owner/collaborators will receive a notification email if you have Notifications configured in the space.
- Finally, click Launch.
- Wait until the environment is active and use as needed. URLs to the environment's applications are typically provided as outputs - these can be found in the environment's Quicklinks on the right pane.
- Check out the Resources pane to get details about your environment's resources. Use this tab to understand what assets each grain spun up, get connection details to specific resources, and more.